Facing unreliable cutting and performance issues? Have you wondered if it might be because you’ve not cleaned and maintained your chainsaw properly?
Cleaning a chainsaw is more important than many think. Many beginners make this mistake, as they underestimate the importance of cleaning their chainsaws. However, it ultimately starts affecting the performance. You must know how to clean a chainsaw and remember to clean the chain and carburetor among other components too.
Why is it important to clean your chainsaw?
A clean chainsaw won’t just deliver better performance, but it’ll also keep you safe. A dirty, unmaintained chainsaw is an invitation to accidents and other risks involved. Dirt and unnecessary material will result in several issues. For instance, the chain might not get lubricated properly, the chainsaw might not cut properly, and more. Some unwanted substances may even get accumulated under the clutch, harming the performance. The air filter and fuel filter might also become dirty, and it’ll affect the performance.

Simple steps on how to clean a chainsaw
Before you start cleaning the chainsaw, you need to make sure that there is no power running to the chainsaw. Never try to clean your chainsaw when it is running, or you’ll just be inviting accidents at this point. Before performing any of the cleaning steps mentioned below, make sure that you remove the powering agent from the chainsaw. If you’re using a gas-powered chainsaw, drain the fuel tank before disconnecting the spark plug connector. If you’re using a battery-powered chainsaw, remember to remove the battery. Similarly, if you’re using a corded electric chainsaw, remember to detach the power cord.
Step 1: Clean the bar
Locate the nuts on the side cover of the chainsaw mounting. These will mount the guide bar to the powerhead. However, do not loosen them yet. On some chainsaw models, you won’t be able to remove the cover when the chain brake is engaged. On other models, you may be able to remove the cover, but it could be difficult to put it back on. Only do it if you’re comfortable with it, otherwise, you’ll need to look for a professional to help you out.
Remember to disengage the chain brake before you start the task. After the chain brake is disengaged, slowly loosen it and then remove the nuts. Separate the guide bar and chain from the powerhead before putting aside the chain.
In case the guide bar is slightly dirty, simply use water and soap to clean it. If it is heavily soiled, a degreaser solvent might be needed to loosen the gunk buildup. For cleaning the chainsaw guide bar, you can either use a puffy knife or use a groove cleaning tool. Keep cleaning the tool around the groove until it is free from any gunk.
For cleaning the bar and chain oiler holes at the base of the bar, use a thin screwdriver or a pick for extracting the gunk blocking the holes. Compressed air would also be a good alternative to use in such situations. The guide bar will have a hole near the tip of the blade to oil the sprocket, clean it too.
Step 2: Clean the chain
The process of how to clean a chainsaw chain is very simple. Find a room with good ventilation, take a bucket, and mix a cup of ammonia with 1 gallon of water. Place the chain in the solution and allow it to soak for 15-20 minutes. Remember to wear a pair of thick rubber gloves for added protection. Make use of a soft-bristled toothbrush for scrubbing different sections of the chain until the chain is free of dirt.
Once you feel the chain is clean, rinse it under clean water to remove any remaining ammonia solution. Then, dry out the chain such that all of the moisture gets removed. Fill out a shallow tray with bar and chain oil. Then, submerge the chain in the oil and allow it to sit for 2-3 hours. Now, turn the chain over and let it sit there for another couple of hours.
Remove the chain from the tray. Now, use a paper towel to slowly dab the chain and remove any dripping oil.
Step 3: Clean the powerhead
Wipe down the exterior of your powerhead body using a dry cloth. Make use of a soft paintbrush and dust off any dirt that might have collected around the crankcase, bar studs, and clutch drum. For removing thick gunk stuck in these areas, go for a thin screwdriver or a pick and scrape it out.
Step 4: Clean the air filter in gas-powered chainsaws
Remove the cover of your chainsaw. Take out the air filter and stuff the chainsaw’s air intake with a rag such that no debris or dirt falls into it. Make use of a soft paintbrush for removing any collected dust. In case the air filter is filthy, run it under normal water for a while, as it’ll dislodge the stuck particles. Then, dry it out before reattaching.
Remember, this step is only for gas-powered chainsaws. You can simply skip it if you’re using an electric-powered chainsaw.
Step 5: Clean the spark plug in your gas-powered chainsaw
If the top cover is removed, you’ll be able to easily access the spark plug. Using a scrench or a T-wrench, unscrew and remove the spark plug. If you find the electrodes to be dark brown color, then everything is fine. If you find the electrodes black, damaged, or chipped, it is time to find a replacement. Check the user manual to know the correct spark plug part number.
Similar to the previous step, this step will only apply to gas-powered chainsaws. You can skip this step if you own an electric-powered chainsaw.
Step 6: Clean the cooling fins in your gas-powered chainsaw
Remove the side panel covering the cooling fins and rope rotor. Make use of a thin screwdriver or a pick for scraping-out any gunk collected between the cooling fins. Remember to be gentle as you won’t want to end up bending the fins. Use a soft paintbrush for removing any debris inside the rope rotor area.
Similar to the previous two steps, this step will only apply to gas-powered chainsaws. You can skip this step if you own an electric-powered chainsaw.
Step 7: Reassemble your chainsaw
Once you’ve completely cleaned the chainsaw and you’re satisfied with the condition of your chainsaw, reassemble it. It would be smart to reassemble the chainsaw in the reverse order in which you removed the parts.
How to clean a chainsaw carburetor without removing it?
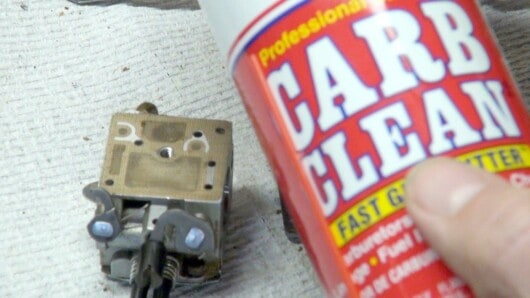
Sometimes, knowing how to clean a chainsaw carburetor isn’t enough. Sometimes, chainsaw users wonder if there is a way to know how to clean a chainsaw carburetor without removing it? The answer is a resounding yes. It can be done by using a high-quality Carburetor Cleaner. It is a cleaning agent formulated with the aim of getting rid of any type of dirt in the carburetor. You can easily find it in stores or purchase it online.

Step 1: Blend the carburetor cleaner with gasoline
Firstly, mix the carburetor cleaner with gasoline. Generally, you can mix 4 ounces of the cleaner with a full gasoline tank. For doing that, you’ll need to use a funnel, as you’ll be able to channel the cleaner into the gas tank slowly. This will ensure that anything doesn’t spill on the floor.
Step 2: Let it sit for a while
Next, you’ll need to let the mixture sit for some time before running it slowly for a while. This will allow the cleaner to properly flow through the engine and the fuel system. Make sure that you avoid hitting higher revolutions per minute when the cleaner is in the gasoline tank. You shouldn’t wash the oil off the cylinder tank walls, too. Immediately, you’ll notice that the RPMs are on the rise. This is a sign that the cleaner used is operating just like it was supposed to. Then comes the time to turn down the idle knob.
Step 3: Add aerosol B12
Now, you should ensure that the carburetor is properly cleaned out and that it is done so thoroughly. You should add aerosol B12 substance into the pilot air jet. This part of the carburetor will act as the intake mouth. Sometimes, it can be hidden from the view, owing to the sensitivity and the potential risks that come with the misuse. You must refer to the product’s user manual to know its exact location in your chainsaw.
Step 4: Give your chainsaw a test
Now, use the chainsaw and determine whether the newly cleaned carburetor is giving the expected performance. Try to turn up the speed and take notice of how the chainsaw engine is performing. If the engine is making unexpected noises, it is likely that it hasn’t been cleaned properly and you’ll need to redo the process all over again.
Conclusion
There you go, now you know how to clean a chainsaw, how to clean a chainsaw chain, and how to clean a carburetor. As long as you ensure that your chainsaw is clean and well-maintained, it’ll continue to deliver peak performance. Further, a clean chainsaw will also have a comparatively longer lifespan. If something goes wrong, or you feel that something is damaged, don’t hesitate to contact a professional for help. Never try to fix it yourself, or you’ll end up making the situation worse. Lastly, never compromise the safety aspect of a chainsaw. While a handy and useful tool, working with a chainsaw is still risky business, so ensure that you’re following the safety standards.


