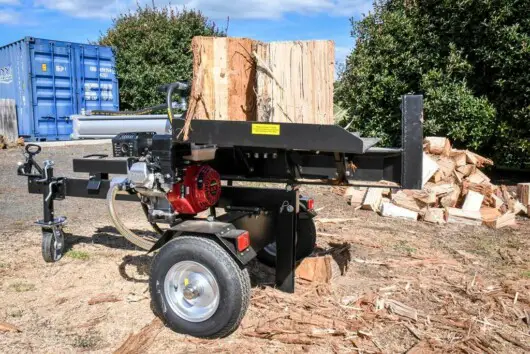
Do you own a log splitter and are looking for how do you bleed air from a hydraulic log splitter? If so, then you are certainly in the right place at the right time.
Bleeding a log splitter involves gathering supplies, working on the surface level, removing parts and components in your way, bleeding the farthest lines first, and keeping the reservoir filled. Bleeding the log splitter is important as it’ll result in a more effective and efficient splitting procedure. Although bleeding is a part of regular maintenance, you should look for any abnormal noise coming from the splitter.
In this article, you’ll get to know all about log splitters, how to bleed a log splitter, and tips for bleeding out the air in your hydraulic log splitter, among others. Continue reading to get all the answers that you’re looking for.
Bleeding in a log splitter
An efficient hydraulic log splitter is one that can split the wood effortlessly. Moreover, it should be quick enough to complete the given tasks in no time. The efficiency of the log splitter will depend on the hydraulic pressure to force wooden logs against the wedge to cut the log into two. If you want your log splitter to deliver the desired result at the optimum level without compromising efficiency at all possible levels, your log splitter will need to go through regular maintenance checks.
A log splitter will need periodic maintenance checks for optimum and smooth functioning. Bleeding the hydraulics is one of the processes that play a pivotal part in the maintenance schedule. It should not be missed and followed as a routine.
Don’t know how to bleed a hydraulic log splitter? You shouldn’t fret, as this article is here to help. If you’re a beginner, you should know what how to bleed a log splitter stands for. Defining bleeding a log splitter can be put as a process of removing any air pockets trapped in the hydraulics. The presence of air in your hydraulic log splitter results in the loss of power in the ram of the log splitter. As the hydraulic fluid gets displaced by the air, the pressure that was applied to the ram will also reduce. To bring back the power into the ram, you’ll need to know how to bleed log splitter.
Before you start bleeding the air out in your hydraulic log splitter, it’s necessary to know which type of air exists in the slitter. It can be either of the three – entrapped free air, entrained mixed air, or dissolved air. You can only bleed entrapped free air pockets, as the air and fluid here don’t get mixed. The dissolved air can be easily removed by increasing the hydraulic oil’s temperature until it gets released into the air.
Usually, the hydraulic oil will likely be at 10% of the dissolved air. Hence, the temperature of the fluid must be raised only when it’s most important. With the fall in static pressure and rise in fluid temperature, the air solubility decreases. This results in the formation of undissolved air bubbles or foam within the fluid. The release of dissolved air can be easily defined as gaseous cavities.
These froth, foam, or bubbles are the entrained mixed air through which you’ll need the hydraulic oil to pass through a screen or gauze. It is tasked with filtering the air bubble from the oil. Before starting, you need to find the cause of the entrained air for ensuring a sound hydraulic system.

How to bleed a log splitter?
There are many different types of log splitters available in the market, and many of them come with the self-bleeding feature. You’ll need to repeat the cycle time of the log splitter a couple of times. However, if you do not own this type of model, you’ll need to know how to bleed a log splitter manually. You can follow these steps to bleed a log splitter.
- Foremost, you will have to arrange safety goggles and an adjustable wrench to bleed the air out.
- Start off by wearing your safety goggles such that your eyes are safe and secure from any flying scrap
- After that, push the hydraulic ram extending to the maximum forward position. It can be done by extending the log splitter’s ram control switch on the powered models. If you’ve got a manual mode, you can then pump the handle for achieving what you want.
- Turn the oil filling plug in an anti-clock direction for removing the oil filling plug by using your hand or an adjustable wrench.
- Rotate the release screw in an anti-clockwise direction for releasing the hydraulic ram. After that, allow the ram to retract and wait until the hydraulic fluid flow is visibly launching out from the oil filling plug hole.
- After that, quickly stop the ram from retracting by turning the log splitter’s release screw in a clockwise direction.
- The final step would be to replace the oil filling plug once more onto the log splitter. Make sure that you’ve tightened the plug properly before you reuse the log splitter. In case the plug is left loose, there is a high probability that the air will enter once more into the hydraulic system.
By now, you’d have got a decent idea that bleeding a log splitter isn’t rocket science. It is a fairly simple process, and you’ll quickly get adapted to bleeding the log splitter as a part of your usual maintenance schedule. Moreover, don’t forget to substitute the drained hydraulic oil for a fresh one, and you’ll be good to go.
Although bleeding should be a part of your regular maintenance schedule, always watch out for abnormal noise coming out of the log splitter. It’s a sign that your log splitter has trapped some air in it. As air flows throughout the splitter, it’ll compress and decompress, causing noticeable banging sounds. Moreover, every hydraulic log splitter comes with an operator manual. You should make sure that you’re reading it properly. As every machine comes with a specific maintenance procedure mentioned in the manual, reading the instructions will become even more important.
Tips for bleeding out the air in your hydraulic log splitter
Bleeding will only work for “free” air pockets where the air hasn’t mixed with the fluid. For dissolved air, you’ll be able to remove it by raising the temperature of the fluid until the air gets released. This must be done only if absolutely necessary, as hydraulic oil normally tends to be at least 10% dissolved air.
With mixed air that appears as foam or froth, you’ll need to pass the fluid through a screen or gauze designed to remove air bubbles from the fluid. To ensure a healthy log splitter, it’ll be important that the cause of the mixed air is discovered.
1. Gather supplies
You’ll need all the right tools along with hydraulic fluid, clean, and tubing empty bottles.
2. Remember to work only on a level surface
To make bleeding the air a lot easier, the surface needs to be level.
3. Remove the components and parts in your way
If possible, you should remove any components or parts from the system to easily access the lines being bled easier.
4. First, bleed the farthest lines
Start off by bleeding the lines that are farthest away from the pump, and then work inward. The lines closest to the pump will need to bleed last, while only bleeding one line at a time.
5. Keep the reservoir filled
Ensure that you’re keeping fluid in the reservoir. Otherwise, if it runs out, you’ll just be introducing more air into the lines, and you’ll have to start from scratch.
Conclusion
Thank you for reading. Hopefully, now you know a lot more about log splitters, how to bleed a log splitter, and tips for bleeding out the air in your hydraulic log splitter, among others. Bleeding a log splitter involves gathering supplies, working on the surface level, removing parts and components in your way, bleeding the farthest lines first, and keeping the reservoir filled. Bleeding the log splitter is important as it’ll result in a more effective and efficient splitting procedure. Although bleeding is a part of regular maintenance, you should look for any abnormal noise coming from the splitter.


